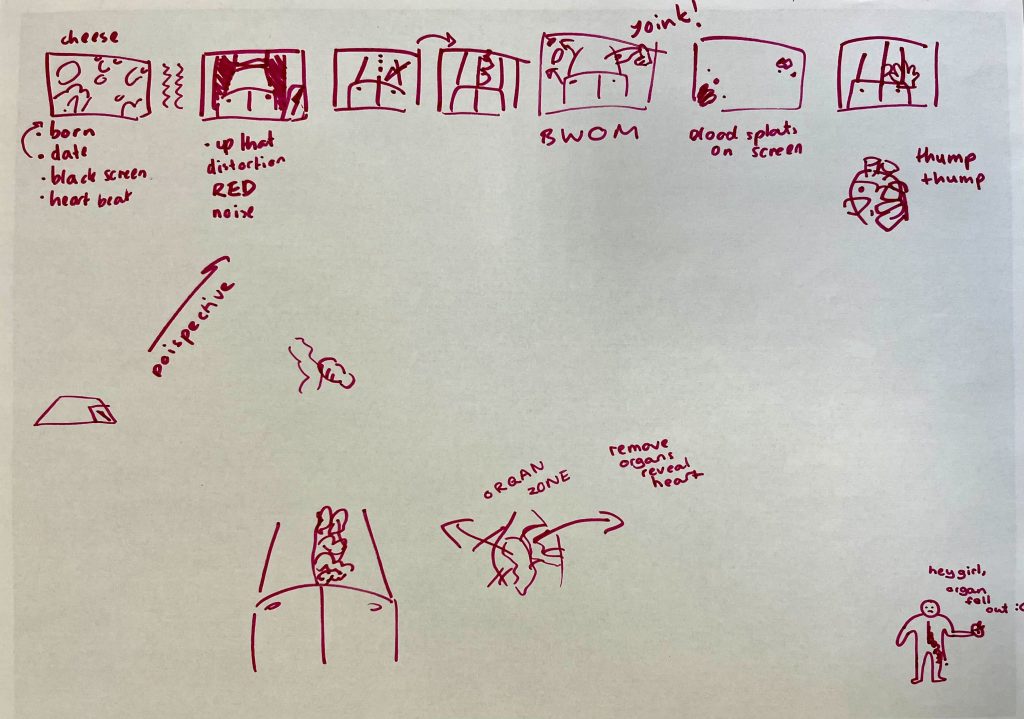
For our third and final level, the point of view will shift so that the player appears to be laying down on their back on the table, looking down at the front of their torso, as if preparing to be operated on. There will be no instructions for this level, just a tray with a knife/scalpel on the edge of the table. We believe that players will figure out from the context clues what they need to do, and that they don’t have much of choice not to.
This level will be quite short, with only parts to it; cut the torso open, tear out the guts, and rip out the heart. With each action the player character should appear to take damage in some way, with screen effects, audio, etc, until the heart is torn out which will be trigger the final cutscene (pause, looking at the still beating heart) before it cuts to black and the level ends.
Setting Up Level 3
I debated creating a new empty scene for level 3, since the view and most of the gameplay will be slightly different from the past 2 levels. However, there are some core features such as the task system, background sounds and post processing volume that will remain the same as the pre-vious scenes, so avoid having to re-create or manually copy over any work I will duplicate our level 2 scene and delete some of the game objects I know will no longer be needed.

After importing and setting up some of the basic objects needed for this level, as well as removing ones from previous levels that are no longer needed (game view, then scene view). The assets for this segment are already drawn in the desired perspective, and we found that changing the camera from its default top-down angle didn’t make much of a difference to the view, so we decided for simplicity to leave it as it is.
We decided that for this level there should be no UI. This continues the trend of the game giving the player fewer and fewer written instructions with each level, relying on them picking up on the context clues presented to them and their experience gained from playing the game so far.
For this level in particular, we want the player to realise on their own what they have to do but hope that they are wrong, making them feel uncomfortable as they see the game gives them no other choice to progress. We also think this level works best without any UI covering up the screen, and makes the first-person perspective more believable without the [] tag and [] arrows/highlights breaking the realism.
Making the Incision
Using a temporary tool asset, I set up the first part of the first task, which will involve picking up the tool from the tray to drag a line down the torso and create an incision. For this first part, I am using the same method that the cloth from level 1 uses, hiding the game object and showing a cursor in its place when it is clicked.
I chose to use this method again because when it comes to clicking and dragging the cursor in a line to form the cut, it would be best to have the cursor positioned at the pointed tip of the tool. I also don’t want the game object itself to potentially get in the way of the player clicking the point to drag.
I was able to combine aspects of my drag-and-drop code with the set-up for making an incision that I set up in the Unity prototype for the game.
The player drags point A circle to point B, locked to only move along the z-axis (ie. a straight line) and not being able to go outside of the line’s start and end positions.
This completes task 1 and also causes the open torso game object to appear. I set canPickUpItems to false to prevent the player from picking up the tool again, as that won’t be needed from here on.
The some of the assets used here either placeholders or work in progresses that will be updated as soon as they are ready.
Gabbing Guts
This will be another click and drag segment, but unlike past ones there won’t be a target area to drag the object to. Instead once the object is let go of, it will fall down and off screen.
To start with, I will try the method of having the object follow the cursor around, changed to a different sprite image, and will then need to figure out how to add some gravity to it only when let go. I think this may be possible with a rigidbody.
This almost works as intended, aside from one small problem; the direction of the gravity. Unfortunately this doesn’t seem to be something I can easily change for just a couple of game objects, as gravity is controlled by the game’s physics system and is a constant.
However, one work around I can use is rotating the whole room set up in the scene by -90 degrees; this way the game’s gravity will be in the downwards direction we want for this scene. All that’s left is to update my script for this segment to use the correct axis for the mouse/game object position (y now instead of z).
Next, I want to try adding a small bit of directional velocity to the object as it’s released/falls. I will use a similar technique that the eye scatter script uses, calculating the change in position to add a small velocity in the direction moved.
More Particle Systems
We add some blood particle systems, one on the torso that sprays outwards and one attached to the removed guts that appears to drip downwards.
I still need some practice with creating particle systems but I think this does the job well enough for now.
Tearing Out Heart

Setting up animations for our heart and hand-with-heart game objects. Luckily I didn’t have any problems with this, as I have now gained more experience working with Unity’s animation window and animator components.
I did have issues with the mouse cursor not remaining hidden during the final cinematic sequence, as well as some issues with my fade to black method which caused the blackOutsquare object to continually toggle on and off. The first issue was being caused by coroutines being called repeatedly when they should only have been called once. For the second issue, I suspect the cursor was being constantly set to visible somewhere else in another script, but I couldn’t find exactly where. As a work around, I created an invisible customer cursor to add to the cursor manager (using an empty image as a sprite), and changed the code to set the cursor to this instead of actually trying to set visible to false.

We also found that the heart-in-hand object wasn’t very easily distinguishable from the open torso in the background, because there is a lot of dark red making it harder to make out the details.
Since this is supposed to be part of the dramatic end sequence of the game we want to make it more obvious what is happening.
After some thought, we tried adding a dark background behind the hand, as well as a red aura around it. We tried a few different opacities for both and eventually decided that this is a good balance that keeps things dark but helps to draw attention to the heart in hand in the centre of the screen.
To finish, we just need to add the remaining sound effects and pauses before cutting the black and changing the scene back to the main menu.
Finished Level 3 Demo
With that, our game is done (for now at least). Admittedly, level 3 was made very quickly and we haven’t had the chance to test it anywhere near as much as the other levels, and Sam and I both feel that it could be improved somewhat. For the final level and the ending of the game, the introduction feels a bit sudden, and we don’t want to loose the tension and intrgue that we have spent the game building as a consequence.
Laura Alford